Are you tired of spending a fortune at coffee shops, yet struggle to recreate that perfect cup in your own kitchen? Do you dream of waking up to the rich aroma of a meticulously brewed coffee, precisely to your taste? You’re not alone. For many coffee lovers, the journey from a decent daily brew to a truly exceptional home-brewed experience can feel daunting. With countless brewing methods, endless bean varieties, and a sea of advice, it’s easy to get lost.
But what if we told you that brewing perfect coffee at home isn’t a secret art reserved for baristas, but a skill anyone can master? This comprehensive guide is designed to demystify the entire process, empowering you with the knowledge and techniques to consistently craft delicious coffee. We’ll delve into every crucial element, from selecting the right beans and understanding the critical role of water, to mastering the grind and exploring various brewing methods.
By the end of this guide, you’ll not only understand the science behind a great cup but also gain practical, actionable steps to elevate your home coffee game. Say goodbye to mediocre mornings and embrace a world of aromatic, flavorful coffee right from your own kitchen. Let’s embark on this exciting journey to unlock your home brewing potential and transform your daily ritual into an extraordinary experience. Get ready to impress your taste buds, save money, and truly savor every sip.
The Pillars of Great Coffee
Before we dive into specific brewing methods, it’s essential to grasp the core elements that dictate the quality of your final cup. Think of these as the fundamental pillars upon which all great coffee is built. Neglecting any one of these can significantly impact the flavor, aroma, and overall enjoyment of your brew. Understanding these basics will give you the power to troubleshoot common issues and consistently produce a superior coffee experience.
The Importance of Coffee Beans
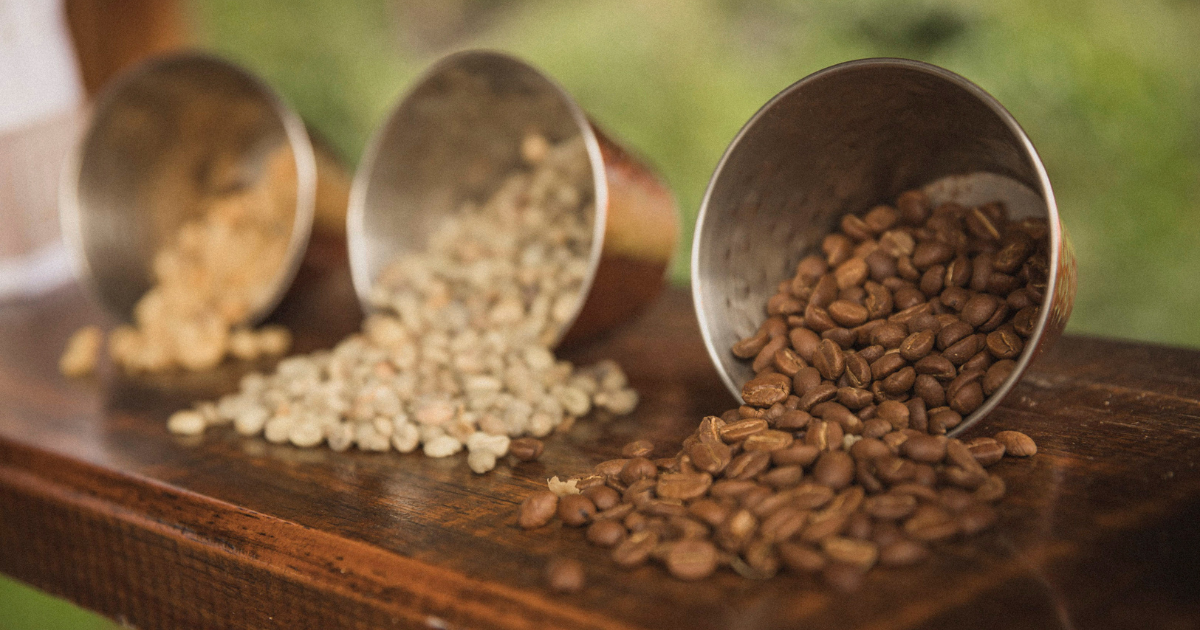
The journey to perfect home-brewed coffee begins with the humble bean. Its quality, freshness, origin, and roast level are arguably the most influential factors in determining your coffee’s final flavor profile.
- Freshness is Key: Coffee beans are a perishable product, and their peak freshness is relatively short-lived once roasted. As soon as beans are roasted, they begin to degas, releasing carbon dioxide and aromatic compounds. Over time, these volatile compounds dissipate, and the beans become stale, leading to a flat, dull, or even bitter taste. For optimal flavor, aim to purchase freshly roasted coffee beans and consume them within 2-4 weeks of their roast date. Always check for a roast date on the packaging, not just a “best by” date.
- Types of Beans: Arabica vs. Robusta: These are the two primary species of coffee plants cultivated for consumption, each offering distinct characteristics.
- Arabica: Accounts for approximately 60% of the world’s coffee production. Grown at high altitudes, Arabica beans are prized for their complex, aromatic, and often sweeter flavor profiles, boasting notes of fruit, chocolate, nuts, and flowers. They typically have lower caffeine content and a lighter body. If you’re seeking a refined and nuanced cup, Arabica beans are generally preferred for specialty coffee at home.
- Robusta: As its name suggests, Robusta is a hardier plant, grown in hotter climates and at lower altitudes. It has higher caffeine content and a bolder, more rubbery, or earthy flavor, often described as more bitter. Robusta is commonly used in espresso blends to create crema and add body, and in instant coffees. For most home brewing enthusiasts focusing on flavor complexity, Arabica coffee beans will be your go-to.
- Roast Levels: The roasting process transforms raw green beans into the aromatic, flavorful beans we recognize. The roast level significantly impacts the coffee’s taste, aroma, and body.
- Light Roast: Roasted for a shorter period, light roast coffee beans retain more of their original characteristics. They are typically lighter in color, have a higher acidity, and often present bright, fruity, or floral notes. They also tend to have slightly more caffeine.
- Medium Roast: This is often considered the “sweet spot” for many, offering a balance between the bean’s inherent flavors and the caramelized notes developed during roasting. They are medium brown in color with a fuller body and a balanced acidity, often exhibiting chocolate, caramel, or nutty undertones. Medium roast coffee is a popular choice for versatile brewing.
- Dark Roast: Roasted until dark brown or nearly black, dark roast coffee exhibits prominent roasty, smoky, and often bitter flavors, with very low acidity and a heavy body. The original characteristics of the bean are largely overshadowed by the roast profile. While bold, they often contain slightly less caffeine due to the extended roasting process.
- Single Origin vs. Blends:
- Single Origin Coffee: These beans come from a single, identifiable geographic location, often a specific farm, region, or country. They showcase the unique terroir of that area, offering distinct and characteristic flavor profiles. For those who enjoy exploring specific nuances and traceability, single origin beans provide an exciting sensory journey.
- Coffee Blends: Blends combine beans from multiple origins, carefully selected and roasted to achieve a specific flavor profile that is consistent and often more balanced than a single origin. Blends can offer complexity and depth by leveraging the best qualities of different beans. Many espresso blends, for instance, are meticulously crafted to deliver a rich crema and robust flavor.
- Storage: Proper storage is crucial for maintaining bean freshness. Always store your coffee beans in an airtight container, away from light, heat, and moisture. A cool, dark pantry is ideal. Avoid refrigeration, as it can introduce moisture and odors. For extended storage, freezing unground beans in an airtight container can preserve freshness for a few weeks, but always allow them to come to room temperature before grinding to prevent condensation.
Understanding the Fundamentals: The Pillars of Great Coffee
Before we dive into specific brewing methods, it’s essential to grasp the core elements that dictate the quality of your final cup. Think of these as the fundamental pillars upon which all great coffee is built. Neglecting any one of these can significantly impact the flavor, aroma, and overall enjoyment of your brew. Understanding these basics will give you the power to troubleshoot common issues and consistently produce a superior coffee experience.
The Importance of Coffee Beans
The journey to perfect home-brewed coffee begins with the humble bean. Its quality, freshness, origin, and roast level are arguably the most influential factors in determining your coffee’s final flavor profile.
- Freshness is Key: Coffee beans are a perishable product, and their peak freshness is relatively short-lived once roasted. As soon as beans are roasted, they begin to degas, releasing carbon dioxide and aromatic compounds. Over time, these volatile compounds dissipate, and the beans become stale, leading to a flat, dull, or even bitter taste. For optimal flavor, aim to purchase freshly roasted coffee beans and consume them within 2-4 weeks of their roast date. Always check for a roast date on the packaging, not just a “best by” date.
- Types of Beans: Arabica vs. Robusta: These are the two primary species of coffee plants cultivated for consumption, each offering distinct characteristics.
- Arabica: Accounts for approximately 60% of the world’s coffee production. Grown at high altitudes, Arabica beans are prized for their complex, aromatic, and often sweeter flavor profiles, boasting notes of fruit, chocolate, nuts, and flowers. They typically have lower caffeine content and a lighter body. If you’re seeking a refined and nuanced cup, Arabica beans are generally preferred for specialty coffee at home.
- Robusta: As its name suggests, Robusta is a hardier plant, grown in hotter climates and at lower altitudes. It has higher caffeine content and a bolder, more rubbery, or earthy flavor, often described as more bitter. Robusta is commonly used in espresso blends to create crema and add body, and in instant coffees. For most home brewing enthusiasts focusing on flavor complexity, Arabica coffee beans will be your go-to.
- Roast Levels: The roasting process transforms raw green beans into the aromatic, flavorful beans we recognize. The roast level significantly impacts the coffee’s taste, aroma, and body.
- Light Roast: Roasted for a shorter period, light roast coffee beans retain more of their original characteristics. They are typically lighter in color, have a higher acidity, and often present bright, fruity, or floral notes. They also tend to have slightly more caffeine.
- Medium Roast: This is often considered the “sweet spot” for many, offering a balance between the bean’s inherent flavors and the caramelized notes developed during roasting. They are medium brown in color with a fuller body and a balanced acidity, often exhibiting chocolate, caramel, or nutty undertones. Medium roast coffee is a popular choice for versatile brewing.
- Dark Roast: Roasted until dark brown or nearly black, dark roast coffee exhibits prominent roasty, smoky, and often bitter flavors, with very low acidity and a heavy body. The original characteristics of the bean are largely overshadowed by the roast profile. While bold, they often contain slightly less caffeine due to the extended roasting process.
- Single Origin vs. Blends:
- Single Origin Coffee: These beans come from a single, identifiable geographic location, often a specific farm, region, or country. They showcase the unique terroir of that area, offering distinct and characteristic flavor profiles. For those who enjoy exploring specific nuances and traceability, single origin beans provide an exciting sensory journey.
- Coffee Blends: Blends combine beans from multiple origins, carefully selected and roasted to achieve a specific flavor profile that is consistent and often more balanced than a single origin. Blends can offer complexity and depth by leveraging the best qualities of different beans. Many espresso blends, for instance, are meticulously crafted to deliver a rich crema and robust flavor.
- Storage: Proper storage is crucial for maintaining bean freshness. Always store your coffee beans in an airtight container, away from light, heat, and moisture. A cool, dark pantry is ideal. Avoid refrigeration, as it can introduce moisture and odors. For extended storage, freezing unground beans in an airtight container can preserve freshness for a few weeks, but always allow them to come to room temperature before grinding to prevent condensation.
The Role of Water
Often overlooked, the water you use to brew your coffee is as critical as the beans themselves. After all, a cup of coffee is over 98% water, so its quality directly impacts the final taste. Using poor-quality water can easily mask the delicate flavors of even the finest coffee beans.
- Quality Matters: Why Filtered Water is Essential: Tap water, while safe to drink, often contains chlorine, minerals, and other impurities that can impart off-flavors to your coffee. Chlorine, in particular, can react negatively with the coffee compounds, creating a harsh or chemical taste. Therefore, using filtered water for coffee brewing is highly recommended. A simple charcoal filter pitcher, a faucet filter, or a whole-house filtration system can make a significant difference. Avoid distilled or excessively softened water, as they lack the mineral content necessary for proper extraction.
Temperature: The Golden Range for Extraction: The temperature of your brewing water is paramount for optimal extraction. Water that’s too cold will lead to under-extracted coffee, resulting in a sour, weak, or grassy taste. Conversely, water that’s too hot can over-extract the coffee, leading to a bitter, hollow, or overly strong flavor. The generally accepted ideal temperature range for coffee brewing is between 195°F and 205°F (90°C and 96°C). Investing in a temperature-controlled gooseneck kettle can provide precision, especially for pour-over methods, allowing you to hit this sweet spot consistently.
Mineral Content: The Unsung Hero: While you don’t want too many impurities, water isn’t just H2O. The presence of certain minerals, particularly calcium and magnesium, plays a vital role in extracting flavor compounds from coffee grounds. These minerals help to dissolve and transport the desirable acids and solids from the coffee, contributing to a balanced and full-bodied cup. This is why many coffee enthusiasts pay attention to water hardness; water that’s too soft won’t extract enough, while water that’s too hard can lead to cloudy coffee and scale buildup in your equipment. Aim for water with a moderate mineral content for the best coffee extraction.
The Grind: Precision is Paramount
Once you have your quality beans and ideal water, the next crucial step is grinding. How you grind your coffee impacts the extraction process more than you might imagine, directly influencing the flavor, body, and balance of your brew.
- Why Grind Size Matters: The Surface Area Principle: Coffee extraction is essentially the process of dissolving soluble compounds from the coffee grounds into hot water. The size of your coffee grind determines the surface area exposed to the water. A finer grind means more surface area, leading to quicker extraction, while a coarser grind means less surface area, requiring more time for extraction. Incorrect grind size is a leading cause of poorly brewed coffee, often resulting in either under-extracted (sour/weak) coffee or over-extracted (bitter/harsh) coffee.
- Grind Types for Different Brewing Methods: There isn’t a “one-size-fits-all” grind. Each brewing method requires a specific grind size to achieve optimal extraction:
- Coarse Grind: Resembles sea salt. Ideal for methods with longer contact times, like the French Press, where grounds are fully immersed.
- Medium-Coarse Grind: Similar to rough sand. Works well for methods like the Chemex or some percolators.
- Medium Grind: Like regular sand. A versatile grind suitable for automatic drip coffee makers and some pour-over cones (e.g., Kalita Wave).
- Medium-Fine Grind: Finer than sand, but not powdery. Often used for Hario V60 pour-overs and siphon brewers.
- Fine Grind: Resembles table salt or sugar. Necessary for espresso machines and AeroPress when brewing concentrated coffee.
- Extra-Fine/Turkish Grind: Powdery, like flour. Used for traditional Turkish coffee.
- Grinders: Burr vs. Blade – The Clear Winner: This is perhaps the most significant investment you can make in your home brewing setup.
- Blade Grinders: These operate like blenders, chopping coffee beans with spinning blades. They create inconsistent particle sizes, leading to uneven extraction and a less flavorful cup. Avoid blade grinders if you’re serious about quality.
- Burr Grinders: These grinders use two abrasive surfaces (burrs) to grind coffee beans into a consistent, uniform particle size. This consistency is vital for even extraction. Burr grinders are available in two types:
- Wheel Burr Grinders: Generally more affordable, but can produce some static.
- Conical Burr Grinders: Often considered superior, producing less heat and a more consistent grind. Investing in a good conical burr grinder will be a game-changer for your home coffee quality, allowing you to precisely dial in your grind for any method.
- Grind Freshness: Always Grind Just Before Brewing: Coffee begins to lose its aromatic compounds and flavor almost immediately after grinding due to increased surface area exposed to air. For the freshest and most flavorful cup, always grind your coffee beans right before brewing. Pre-ground coffee, while convenient, sacrifices a significant amount of flavor and aroma.
Popular Home Brewing Methods Explained
Now that we’ve established the foundational elements—beans, water, and grind—it’s time to explore the diverse and rewarding world of home coffee brewing methods. Each method offers a unique experience, influencing the coffee’s body, clarity, and flavor extraction. Understanding how each works will help you choose the perfect method for your taste preferences and lifestyle.
Pour Over (e.g., Chemex, Hario V60)
The pour over coffee method is celebrated by many coffee enthusiasts for its ability to produce a clean, bright, and nuanced cup, allowing the intricate flavors of specialty coffee beans to shine through. It requires precision and technique but rewards with exceptional clarity.
- How it Works: Precision and Control: Pour over brewing involves manually pouring hot water over a bed of coffee grounds in a cone-shaped dripper, which sits atop a vessel (like a mug or carafe). Gravity then pulls the water through the grounds and a paper filter, resulting in a clean, sediment-free extraction. The control you have over water flow, temperature, and brew time allows for a highly customized brewing experience.
Equipment Needed:
- Pour Over Dripper: Popular options include the Hario V60 (known for its conical shape and large single hole, promoting faster flow and bright flavors) and the Chemex (a classic hourglass-shaped vessel with a thicker filter, producing an exceptionally clean cup). Other options include Kalita Wave (flat bottom for even extraction) and Clever Dripper (immersion brew followed by pour over).
- Paper Filters: Specific to your dripper (e.g., V60 filters, Chemex filters). Thicker filters will trap more oils and fine particles, leading to a cleaner cup.
- Gooseneck Kettle: Essential for precise and controlled pouring, which is crucial for even saturation.
- Coffee Grinder: A burr grinder is paramount for a consistent grind.
- Digital Scale with Timer: For accurate measurement of coffee grounds and water, and precise brew timing.
Step-by-Step Guide for a Consistent Pour Over:
- Heat Water: Heat your filtered water to the ideal temperature of 195-205°F (90-96°C).
- Grind Coffee: Grind your fresh beans to a medium-fine consistency, similar to table salt or sugar. Adjust as needed based on your specific dripper and desired flow rate.
- Prepare Filter and Rinse: Place the paper filter in your dripper. Pour a small amount of hot water over the filter to rinse it. This removes any papery taste and preheats the brewing equipment. Discard the rinse water.
- Add Coffee: Place the dripper on your scale, add the ground coffee, and zero out the scale. Aim for a coffee-to-water ratio of 1:15 to 1:17 (e.g., 20g coffee to 300-340g water).
- The Bloom (Pre-infusion): Start your timer. Pour just enough hot water (about twice the weight of your coffee, e.g., 40g for 20g coffee) evenly over the grounds to saturate them. Let it sit for 30-45 seconds. This “bloom” allows trapped CO2 to escape, preventing sour flavors and promoting even extraction.
- Pulsed Pouring: Continue pouring the remaining water in slow, controlled circles, starting from the center and spiraling outwards, avoiding the filter walls. Pour in pulses, allowing the water level to drop slightly between each pour. Aim for a total brew time of 2.5 to 4 minutes, depending on your dripper and desired strength.
- Serve and Enjoy: Once the water has fully drained, remove the dripper and serve your freshly brewed pour over coffee.
Pros & Cons of Pour Over Coffee:
- Pros: Produces an incredibly clean, bright, and nuanced cup; highlights the inherent flavors of specialty coffee beans; offers high control over the brewing process.
- Cons: Requires precision and practice; can be time-consuming; requires specific equipment (gooseneck kettle, scale); not ideal for brewing large batches.
French Press
The French Press, also known as a cafetière or coffee press, is a classic brewing method celebrated for producing a full-bodied, rich, and robust cup of coffee. Unlike pour-over methods that rely on gravity and filtration, the French Press involves full immersion of coffee grounds in hot water, allowing for maximum extraction of oils and solids. This results in a coffee with a bolder flavor and a delightful mouthfeel, though often with some fine sediment.
- How it Works: Full Immersion and Pressing: In a French Press, coarse coffee grounds are fully steeped in hot water for several minutes. After the desired brewing time, a plunger with a mesh filter is slowly pressed down, separating the brewed coffee from the grounds, pushing them to the bottom of the carafe. This direct contact between water and coffee ensures a thorough extraction of flavors and oils.
- Equipment Needed:
- French Press Brewer: Available in various sizes and materials (glass, stainless steel). Stainless steel options offer better heat retention and durability.
- Coffee Grinder: A burr grinder is crucial for producing the uniform, coarse grind required.
- Kettle: Any kettle will do, but a temperature-controlled one is ideal for precision.
- Digital Scale with Timer: For accurate measurements and brewing time.
- Step-by-Step Guide for a Rich French Press Coffee:
- Heat Water: Heat your filtered water to between 195°F and 205°F (90°C and 96°C).
- Grind Coffee: Grind your fresh beans to a coarse consistency, resembling coarse sea salt. This is vital to prevent over-extraction and excessive sediment.
- Preheat French Press: Pour a small amount of hot water into the empty French Press, swirl it around, then discard. This helps maintain brewing temperature.
- Add Coffee: Add your coarsely ground coffee to the preheated French Press. A common coffee-to-water ratio is 1:12 to 1:15 (e.g., 30g coffee to 360-450g water).
- Add Water and Stir: Pour the hot water evenly over the grounds, ensuring full saturation. Gently stir the coffee and water with a non-metal spoon (to avoid scratching the glass) to ensure all grounds are wet.
- Steep: Place the lid on the French Press with the plunger pulled up. Let the coffee steep for 4 minutes. Some prefer 3 minutes for a lighter brew or up to 5 minutes for a stronger one.
- Slowly Plunge: After steeping, slowly and steadily press the plunger straight down. Avoid pressing too fast, as this can force fine particles through the filter and create a muddy cup. Stop just before the grounds are fully compacted at the bottom.
- Serve Immediately: Pour the coffee into your mug immediately. Leaving the coffee in the French Press after plunging can lead to continued extraction and bitterness.
- Pros & Cons of French Press Coffee:
- Pros: Produces a full-bodied, rich, and flavorful cup; relatively simple to use; portable for travel; highlights the bolder notes of darker roasted coffees.
- Cons: Can result in fine sediment in the cup; requires a specific coarse grind; not as “clean” tasting as pour-over methods; easy to over-extract if not careful with timing.
AeroPress
The AeroPress is a remarkably versatile and forgiving coffee maker cherished for its speed, portability, and ability to produce a clean, rich, and concentrated brew. It’s often touted as a hybrid brewing device, combining elements of French Press (full immersion) and espresso (pressure extraction). Its compact design makes it a favorite among travelers and those seeking a quick, high-quality cup without much fuss.
- How it Works: Immersion and Pressure: The AeroPress consists of two cylindrical plastic parts that form a vacuum seal. Coffee grounds are immersed in hot water, much like a French Press. After steeping, a plunger is pressed down, forcing the brewed coffee through a small paper filter directly into your cup or carafe, using air pressure. This quick pressure extraction results in a remarkably clean cup with very little sediment.
- Equipment Needed:
- AeroPress Kit: Includes the plunger, chamber, filter cap, stirrer, scoop, and paper filters.
- AeroPress Filters: Small, round paper filters that fit precisely into the filter cap. Reusable metal filters are also available.
- Coffee Grinder: A burr grinder is recommended for consistency, though the AeroPress is forgiving with grind size.
- Kettle: For heating water.
- Step-by-Step Guide for a Versatile AeroPress Brew:
- (Note: The AeroPress offers various brewing styles, including “standard” and “inverted.” We’ll outline a common standard method.)
- Heat Water: Heat filtered water to your desired temperature, typically between 175°F and 205°F (80°C and 96°C), depending on desired strength and bean roast.
- Grind Coffee: Grind your fresh beans to a fine to medium-fine consistency, similar to table salt or slightly finer.
- Assemble AeroPress (Standard Method): Place a paper filter in the filter cap and twist it onto the AeroPress chamber. Place the chamber directly over your mug or serving vessel.
- Add Coffee: Add your ground coffee to the chamber. Use the AeroPress scoop (approximately 17g per scoop) or measure with a scale.
- Add Water: Pour hot water over the grounds until it reaches the desired level (e.g., up to marker 4 for a concentrated shot, or more for a larger brew).
- Stir and Steep: Stir the coffee and water for about 10 seconds. Let it steep for 1 to 2 minutes, depending on desired strength.
- Press: Insert the plunger into the top of the chamber and press down slowly and steadily for 20-30 seconds. You should feel a gentle resistance. Stop pressing when you hear a hissing sound.
- Dilute (Optional): If you’ve made a concentrated brew, dilute with hot water to your preferred strength for an Americano-style coffee.
- Pros & Cons of AeroPress Coffee:
- Pros: Extremely fast brewing time; portable and durable; produces a clean cup with low acidity and virtually no sediment; highly versatile (can make concentrated shots, regular coffee, cold brew); easy to clean.
- Cons: Brews a smaller volume per batch (typically one large cup or two small servings); requires specific AeroPress filters.
Drip Coffee Makers (Automatic Brewers)
The automatic drip coffee maker is arguably the most common and convenient way to brew coffee at home for many households. These machines automate most of the brewing process, making them ideal for daily use, especially when brewing for multiple people or when time is limited. While often criticized by specialty coffee purists, modern drip coffee makers, when chosen and used correctly, can produce a surprisingly good and consistent cup.
- How to Choose a Good One: Beyond Basic Functionality: Not all drip coffee makers are created equal. High-quality models adhere to proper brewing standards, such as those recommended by the Specialty Coffee Association (SCA). Look for features like:
- Water Temperature Control: Ensures water heats to the optimal 195-205°F (90-96°C) range and maintains it throughout the brew cycle.
- Even Water Dispersion: A “shower head” style sprayer ensures all grounds are evenly saturated, preventing under-extraction.
- Brew Basket Design: Cone-shaped baskets (like those used in pour-overs) are often preferred for better extraction over flat-bottomed ones, though both can work well with the right grind.
- Thermal Carafe: A stainless steel thermal carafe is superior to a glass carafe with a hot plate, as it keeps coffee hot without “cooking” it and developing a burnt taste.
- Tips for Better Drip Coffee: Even with a basic machine, you can significantly improve your results by focusing on these elements:
- Use Filtered Water: As with all methods, filtered water is crucial for taste and to prevent mineral buildup.
- Proper Coffee-to-Water Ratio: Many automatic brewers come with scoops that are often inaccurate. Use a digital scale to measure your coffee grounds. A standard coffee-to-water ratio for drip coffee is 1:15 to 1:17 (e.g., 60g coffee for a 1-liter pot).
- Correct Grind Size: For most drip brewers, a medium grind (like regular sand) is ideal. If your coffee tastes weak or sour, try a slightly finer grind; if it’s bitter, try coarser.
- Clean Your Machine Regularly: Mineral buildup (scale) and old coffee oils can significantly impact taste and performance. Descale your machine monthly (using vinegar or descaling solution) and clean the brew basket and carafe after every use.
- Use Quality Filters: Opt for oxygen-bleached or natural brown paper filters.
- Pros & Cons of Drip Coffee Makers:
- Pros: Highly convenient and easy to use; ideal for brewing larger batches; requires minimal effort and supervision; widely available and affordable.
- Cons: Offers less control over brewing variables compared to manual methods; can produce less nuanced flavors if the machine isn’t high quality; coffee can degrade quickly if left on a hot plate.
Moka Pot (Stovetop Espresso)
The Moka Pot, often erroneously called a “stovetop espresso maker,” is an iconic Italian brewing device that uses steam pressure to brew strong, concentrated coffee. While it doesn’t produce true espresso (which requires much higher pressure), it yields a robust, rich, and intense brew that’s perfect for enjoying black, or as a base for milk-based drinks like lattes and cappuccinos. It’s a beloved method for its distinct flavor profile and charming, classic design.
- How it Works: Steam Pressure Extraction: A Moka Pot consists of three chambers: a bottom chamber for water, a middle filter basket for coffee grounds, and a top chamber where the brewed coffee collects. As water in the bottom chamber heats, it creates steam pressure, forcing the hot water up through the coffee grounds in the filter basket and into the upper chamber, producing a strong, concentrated brew.
- Equipment Needed:
- Moka Pot: Available in aluminum (traditional) or stainless steel (more durable, non-reactive). Choose a size appropriate for your serving needs.
- Coffee Grinder: A burr grinder is recommended for a consistent grind.
- Stovetop: Gas, electric, or induction-compatible stove.
- Step-by-Step Guide for a Bold Moka Pot Brew:
- Fill Bottom Chamber with Hot Water: Crucially, fill the bottom chamber with pre-heated water (just off the boil). This prevents the coffee grounds from “cooking” and developing a metallic or burnt taste as the pot heats up. Fill to just below the safety valve.
- Add Coffee Grounds: Fill the filter basket loosely with fine to medium-fine ground coffee (finer than drip, coarser than espresso). Do not tamp or compress the grounds; a light leveling is sufficient. Too much tamping will lead to over-extraction and bitterness.
- Assemble Moka Pot: Carefully screw the top and bottom chambers together, ensuring a tight seal. Use a towel if the bottom chamber is hot from the pre-heated water.
- Place on Stovetop: Place the Moka Pot on a medium to low heat. A slower, gentler extraction yields better flavor. Keep the lid open initially.
- Monitor Extraction: As the water heats, coffee will begin to seep into the upper chamber. It should emerge as a slow, steady stream, resembling warm honey. If it gushes out too quickly, your heat is too high or grind too coarse. If it struggles, your grind might be too fine.
- Remove from Heat: Once the coffee stream turns a lighter, yellowish-blonde color, or when you hear a bubbling sound, immediately remove the Moka Pot from the heat. This prevents over-extraction and bitter flavors.
- Serve Immediately: Pour the coffee into cups and enjoy. The concentrated brew can be diluted with hot water if desired.
- Pros & Cons of Moka Pot Coffee:
- Pros: Produces a strong, concentrated, full-bodied coffee; affordable and durable; classic aesthetic; great base for milk drinks.
- Cons: Does not produce true espresso; easy to scorch the coffee if heat is too high; requires careful monitoring; can result in bitterness if over-extracted.
Beyond simply understanding the fundamentals and methods, mastering home coffee brewing involves refining your technique and paying attention to subtle details. These tips and tricks will help you consistently achieve a superior cup, moving beyond just good coffee to truly great coffee.
The Golden Ratio: Coffee-to-Water Proportion
One of the most critical variables in achieving consistent and delicious coffee is the coffee-to-water ratio. This ratio dictates the strength and concentration of your brew. While personal preference plays a significant role, there’s a widely accepted “Golden Ratio” that serves as an excellent starting point for most brewing methods.
The standard recommendation, often cited by the Specialty Coffee Association (SCA), is a coffee-to-water ratio of 1:15 to 1:18. This means for every 1 gram of coffee, you should use between 15 and 18 grams of water.
- Example: If you’re brewing with 20 grams of coffee, you’d aim for 300 to 360 grams of water (20g x 15 = 300g; 20g x 18 = 360g).
Using a digital scale with a timer is indispensable for precise measurements. Eyeballing amounts or relying on coffee scoops can lead to inconsistent results. Start with a 1:16 ratio and adjust incrementally based on your taste. If your coffee tastes too weak, try a slightly lower ratio (e.g., 1:15); if it’s too strong, go higher (e.g., 1:18). Mastering this ratio gives you consistent control over your coffee’s intensity and flavor balance.
Timing and Temperature Control
Precision in both brewing time and water temperature are hallmarks of exceptional home coffee brewing. These factors directly impact the extraction process and, consequently, your coffee’s flavor.
- Temperature Consistency: We’ve already stressed the importance of coffee water temperature between 195-205°F (90-96°C). Investing in a gooseneck kettle with temperature control allows you to set and maintain this precise temperature, eliminating guesswork. For methods like pour-over, this consistency ensures even extraction from start to finish. Without it, your water temperature will drop throughout the brew, leading to uneven extraction and potentially sour or bitter notes.
- Optimal Brew Time: Each brewing method has an ideal contact time between water and grounds.
- Pour Over: Typically 2.5 to 4 minutes.
- French Press: 4 minutes.
- AeroPress: 1 to 2 minutes. Using a timer (often integrated into a digital scale) is crucial. Brewing too short results in under-extraction, leading to sourness. Brewing too long causes over-extraction, resulting in bitterness. Adjusting your grind size is the primary way to control brew time; finer grinds slow extraction, coarser grinds speed it up. Consistent timing, combined with the right temperature, will elevate your brewing precision.
Regular Cleaning and Maintenance
This might seem obvious, but consistently neglecting to clean your coffee brewing equipment is a fast track to mediocre coffee. Residual coffee oils and mineral buildup (scale) can impart stale, rancid, or metallic flavors to your fresh brew, no matter how good your beans or technique are.
- Daily Cleaning: After each use, rinse all parts of your brewing device (carafe, filter basket, plunger) thoroughly with warm water. For drip coffee makers, clean the carafe and brew basket daily.
- Deep Cleaning/Descaling:
- Drip Coffee Makers: Descale monthly, or more often if you have hard water. Use a white vinegar solution (equal parts vinegar and water) or a commercial descaling agent. Run a brew cycle with the solution, then follow with several cycles of clean water.
- French Press/AeroPress: Occasionally disassemble and clean all parts thoroughly, especially the mesh filters.
- Grinders: Coffee oils can build up in your grinder over time, turning rancid. Use dedicated grinder cleaning tablets every few weeks, or periodically brush out any accumulated grounds. Remember, a clean machine equals a clean taste. Proper maintenance extends the life of your equipment and ensures every cup tastes as good as it should.
Experimentation and Personal Preference
While guidelines and ratios provide an excellent starting point, the “perfect cup” is ultimately subjective. The beauty of home coffee brewing lies in the ability to tailor it to your unique palate. Don’t be afraid to deviate slightly from recommended parameters to discover what truly resonates with you.
- Adjust Ratios: Prefer a stronger, bolder coffee? Try a slightly lower coffee-to-water ratio. Want something lighter? Increase the water amount.
- Vary Grind Size: If your coffee is too bitter, coarsen your grind. If it’s too weak or sour, try a finer grind.
- Explore Temperatures: Experiment with water temperatures within the optimal range. Some coffees might shine brighter at 200°F, while others prefer 195°F. Keep a small brewing journal to note your adjustments and their effects. This iterative process of tasting, adjusting, and learning is what transforms a good brewer into a true coffee artisan, consistently crafting the perfect brew to your unique taste.
Troubleshooting Common Coffee Brewing Problems
Even with the best intentions and equipment, you might encounter issues. Don’t worry, many common problems have straightforward solutions. Understanding these will empower you to diagnose and fix your brew.
My Coffee Tastes Too Bitter
Bitterness is often a sign of over-extracted coffee, meaning too many soluble compounds have been pulled from the grounds.
- Causes: Grind is too fine, water is too hot, brew time is too long, or too much coffee for the amount of water.
- Solutions: Try a coarser grind, lower your water temperature slightly, reduce your brew time, or use slightly less coffee. Ensure your equipment is clean, as rancid oils can also contribute to bitterness.
My Coffee Tastes Too Sour/Weak
Sourness or a weak, thin taste typically indicates under-extracted coffee, meaning not enough soluble compounds were dissolved.
- Causes: Grind is too coarse, water is too cold, brew time is too short, or not enough coffee for the amount of water.
- Solutions: Try a finer grind, increase your water temperature to the optimal range (195-205°F), extend your brew time, or use slightly more coffee. Ensure all grounds are evenly saturated during brewing.
My Coffee Has Too Much Sediment
Excessive “sludge” at the bottom of your cup can detract from the coffee experience.
- Causes: Grind is too fine for the brewing method (especially French Press), grinder produces inconsistent particle sizes (blade grinder), or the filter is not performing adequately.
- Solutions: For French Press, ensure your grind is very coarse. If using a blade grinder, consider upgrading to a burr grinder for uniform particles. For pour-over or drip, ensure your filter is seated correctly or try a thicker paper filter if applicable. Gently pour to avoid agitating settled fines.
Elevating Your Home Coffee Experience
Beyond the technicalities of brewing, truly elevating your home coffee experience involves a holistic approach. It’s about creating a ritual, enjoying the process, and continuously exploring.
- Invest in a Good Grinder: As repeatedly emphasized, a quality burr grinder is the single most impactful upgrade you can make. It provides consistent grind size, which is foundational to proper extraction across all methods.
- Use a Digital Scale: Precision is key. A digital scale with a timer will allow you to accurately measure coffee and water, ensuring repeatable and delicious results.
- Consider a Temperature-Controlled Kettle: For manual brewing methods, a gooseneck kettle with temperature control offers unparalleled precision, allowing you to hit the golden temperature range every time.
- Explore Different Beans: Don’t stick to just one type. Experiment with single origin coffee beans from various regions, different roast levels, and diverse flavor profiles. Many specialty coffee roasters offer subscriptions or sampler packs.
- Join the Community: Engage with online coffee forums, local roasters, or coffee enthusiast groups. Sharing experiences and learning from others can rapidly expand your knowledge and passion.
- Taste Mindfully: Take the time to truly taste your coffee. Can you detect notes of chocolate, fruit, or flowers? This mindful approach enhances appreciation and helps you identify what you enjoy most.
Brewing the perfect coffee at home is an attainable goal for anyone willing to invest a little time, learn the fundamentals, and embrace the process. We’ve journeyed through the critical pillars – from understanding the profound impact of fresh, quality coffee beans and the often-underestimated role of filtered water, to mastering the all-important coffee grind size. We’ve also explored popular home brewing methods like the elegant Pour Over, the full-bodied French Press, the versatile AeroPress, the convenient Drip Coffee Maker, and the classic Moka Pot, each offering a unique pathway to your ideal cup.
Remember that while precision in ratio, temperature, and timing is crucial, the ultimate perfection lies in your personal preference and enjoyment. Don’t be afraid to experiment, troubleshoot, and fine-tune your process. By applying the knowledge shared in this ultimate guide, you are now equipped to transform your daily coffee ritual into an art form, consistently crafting delicious, aromatic, and deeply satisfying coffee right from the comfort of your own kitchen. Start experimenting today, and savor the rich rewards of your newfound home barista skills!